Why You Need Injector Seals for your Mazdaspeed, Part 2

This post is part 2 of a 2-part series on the importance of injector seals. If you’re just now discovering this post, be sure to tune in to part 1 before continuing here.

___________________________________________________________________

Like the title says, you need injector seals for your MZR! Here’s why.

When Mazda designs a part, they design it with the “typical” customer and OEM power in mind – not the power hungry, boost craving driver.  Yeah, I’m talking about you and you know it – and we have just the thing to keep you and your MZR in check.  As you add more fuel and more boost, the weakest link is eventually going to give. That link is the OEM injector seals.

Three Reasons You Need Injector Seals For Your Mazdaspeed

  1. Reliability is sacrificed using the OEM seals.
  2. Leaking seals causes loss of power.
  3. Inconsistent performance is caused by leaks.

So, if you are just tuning in to our blog, then shame on you, go read part one like everyone else! With that, let’s dive into the design of the seal and how it works.

We put 500 hard miles on the Speed3 and here are the results.  500 miles may not sound like a lot, but the company owned MS3 does not live the normal life. It spends most of its time on the dyno testing new products pull after pull, may have hit 35psi, and when it does hit the streets, it’s driven by an employee searching for the governor speed.  I think we can all agree that the 500 miles was a fair amount of abuse to put the injector seals. Plus, other sets of seals have been running in alpha testers vehicles for thousands of miles without issue.

Now that we have that covered, let’s talk a bit more about the design of the seal and how it works.

Injector-Seals-Mazdaspeed-MZR-Engine-Tokay-

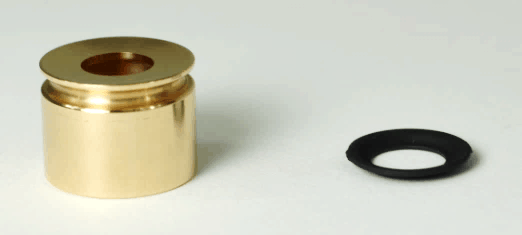
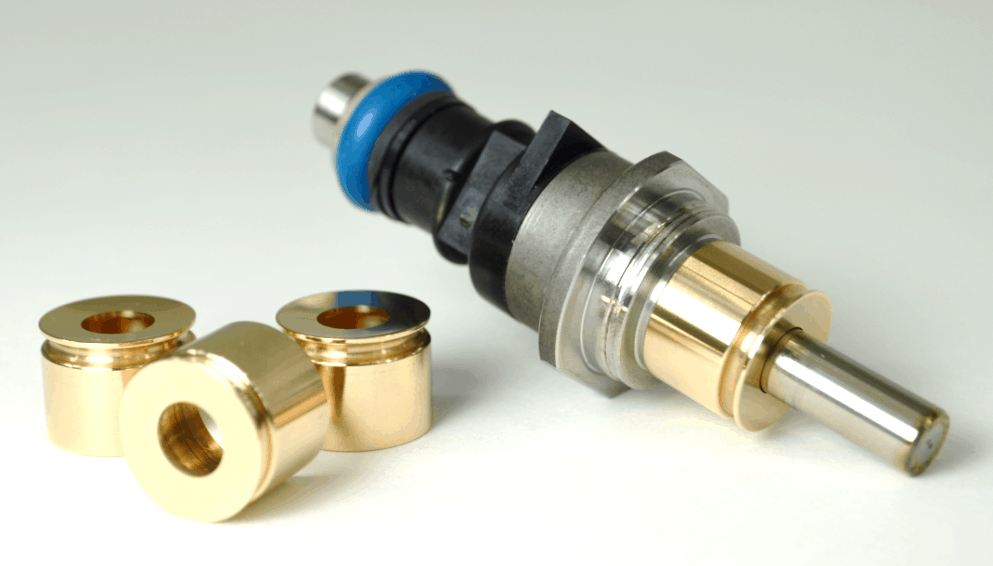
It’s no longer just a washer with one sealing surface – it’s a cup. So it seals in the OEM location AND along the side of the cup. The secret is in the design (which is all thanks to @Tokay444 from MazdaSpeedForums).  The lip at the bottom of the cup is flared just a bit so that it crushes down tight against the cylinder head, and as it crushes down it also crushes outward, pushing against the wall of the port much like an O-ring. If you are having trouble visualizing the flared lip crushing outward then check out the image below. Time to get technical!

FEA-COrkSport-Injector-Seals

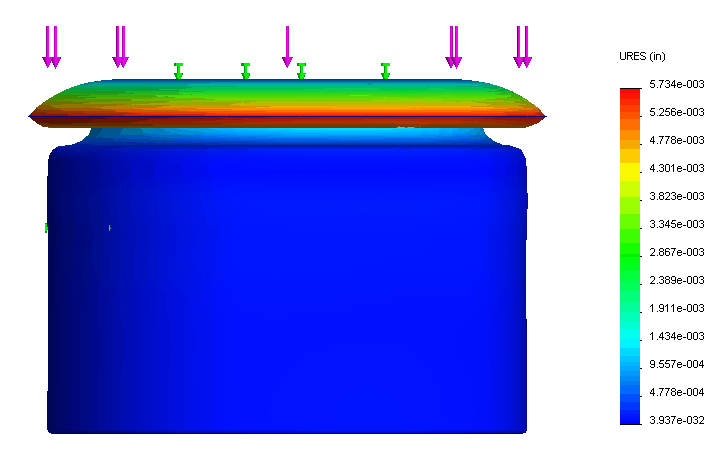
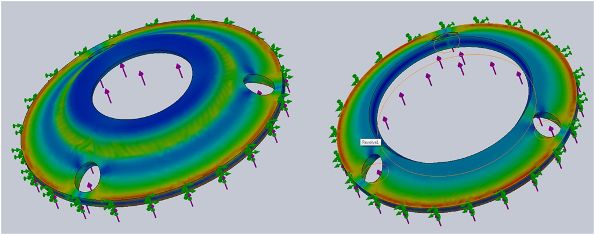
Looking at this side view of the seal, you can clearly see that the flared lip is extended further outward than the side of the seal. (Please note that in this FEA, or Finite Element Analysis, the deformation scale factor is 6.5:1, i.e. highly exaggerated). This design is what separates the CorkSport seal from any other seals on the market today. In the FEA the seal is subjected to 3300lbf in the direction of the arrows; 3300lbf is the approximate clamping force of an M8x1.25 torqued to 18ft-lb. The areas in red indicate a displacement of 0.0057 inches, which is just enough to begin yielding (permanently bending) the beryllium copper material. After the 500 miles of use, we had the four seals precision measured using a CMM (Coordinate Measuring Machine). On average, the seals yielded 0.0015 inches confirming our FEA.

Still following?

So what does this mean to you? When you torque down the fuel injector bolt and clamp you are applying approximately 3300lbf to the injector seal. This crushes the seal downward pushing the flared lip outward into the wall for ultimate sealing strength; and we have all the data to prove it! The CorkSport seal works flawlessly, but because of the design they are not reusable like any other crush seal.

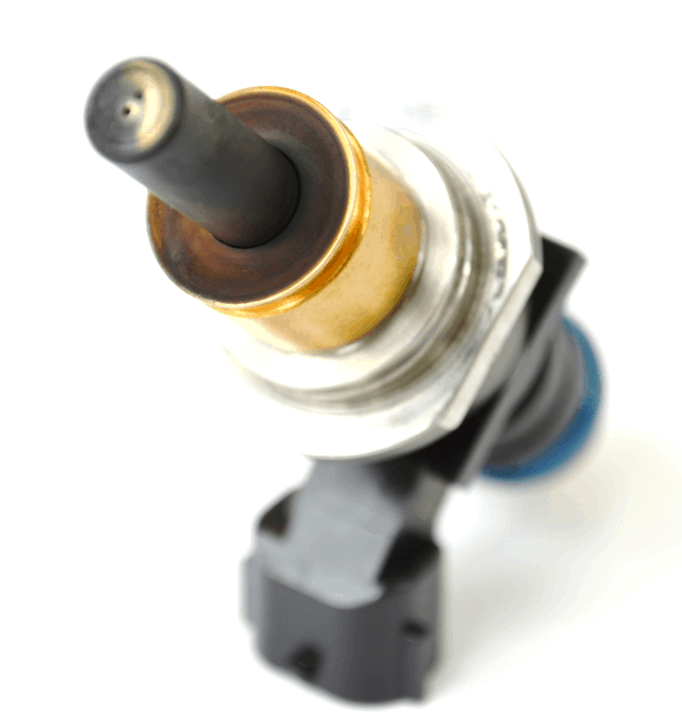
So, now that we are done with all the technical stuff let’s take a look at the used seals. First, I would like to remind you what the injector looked like with the OEM crush washer and only 4000 miles.
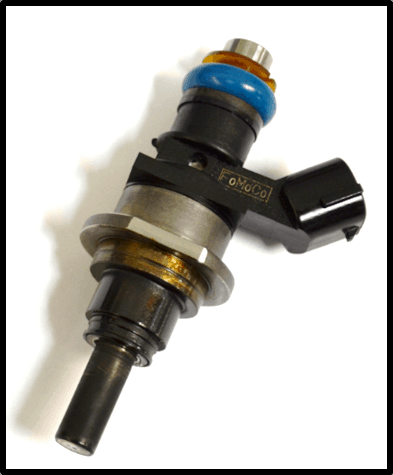
Injector-Seals-Mazdaspeed-MZR-Engine-Tokay-Info-Tech-Injector-Fuel

Extremely dirty with an excessive amount of combustion gases blowing by the OEM injector seal. This makes for a very unhappy MZR. Second, in the images you are about to see, the seals have not been cleaned in any way, shape, or form. I pulled these out of the car and immediately took the pictures. Prepare to be WOW’d; I know I was…

Injector-Seals-Mazdaspeed-MZR-Engine-Tokay-Info-Tech-Injector-Fuel-2


Injector-Seals-Mazdaspeed-MZR-Engine-Tokay-Info-Tech-Injector-Fuel-3

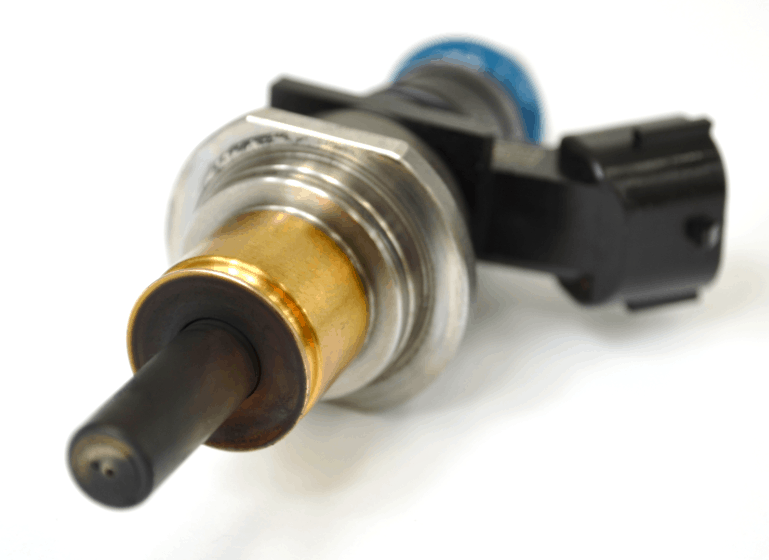
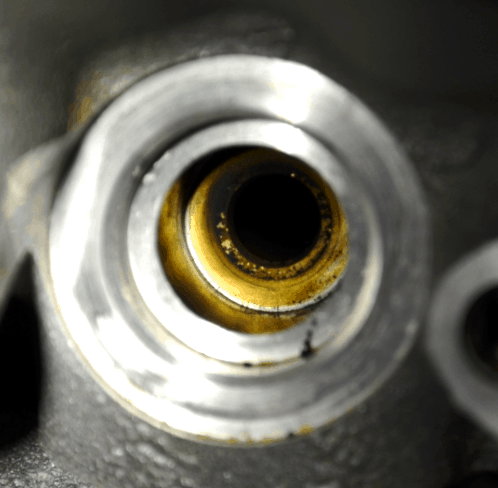
Besides the clean injector body, there is a more subtle detail that needs to be pointed out. If you look at the very edge of the flared lip on the seal you will notice that the black soot does not go all the way to the edge. This further confirms that the seals are working the way Brock (@Tokay444 on MSF) had envisioned them and we can also see this “clean ring” in the cylinder head below.

Injector-Seals-Mazdaspeed-MZR-Engine-Tokay-Info-Tech-Injector-Fuel-Inside-Intake-Manifold

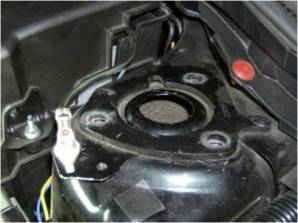
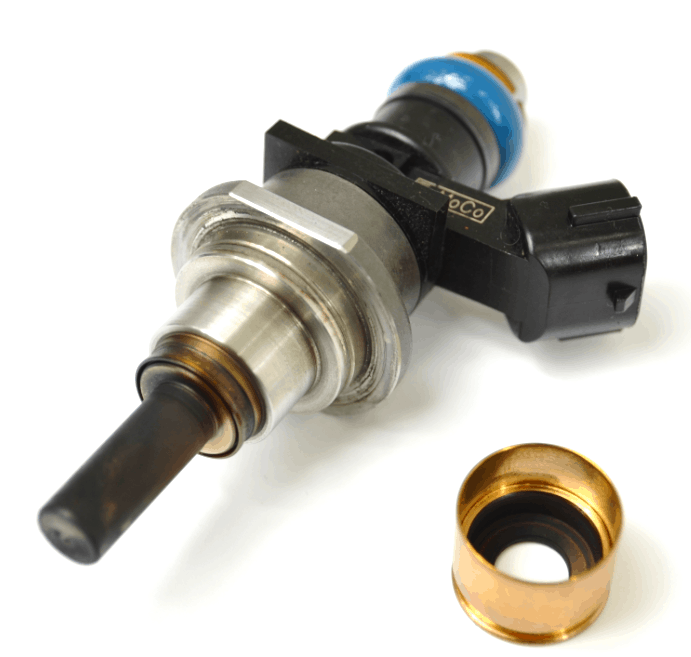
In the image below you will notice that the seal is dirty on the inside, but that’s okay – that happens by design. The “shelf” that you see midway up on the inside of the seal seals against the injector body instead of in the OEM location further down around the injector nozzle. This change in sealing location allows the flared edge to deflect how it needs.

Injector-Seals-Mazdaspeed-MZR-Engine-Tokay-Seal-Dirty

If I haven’t convinced you yet why you need injector seals for your Speed3 then you’re hopeless…you should go get a Civic or something else that’s slow…

Injector-Seals-Mazdaspeed-MZR-Engine-Tokay-Full-Injector

Between our results and the reviews given to us from our alpha testers we have great confidence in the seals and you should too! Keep an eye out for these to be released very soon! Zoom – Zoom! -Barett, CS Engineering

Customer Collaboration – Adjustable Short Shifter & Shifter Bushings

If I were to make a list of OEM parts that I dislike, in the number one spot would be the shifter. I hate feeling like I am stirring a large pot of soup when I am putting my car into gear. Any auto enthusiast wants a solid shift when they are driving.

Mazdaspeed 3 short shifter, Billet CNC goodness in the form of a Mazdaspeed 3 short shifter

When I was given the opportunity to test out the Corksport short throw shifter, I was so excited. Not only was I testing for a high quality company, but I was finally able to get rid of the sloppiness from my OEM shifter. The install went smooth, it was the first time I have installed a short shifter on my own, but it was a piece of cake with the step by step instructions that came with it.

CorkSport Adjustable Short Shifter

Once it was installed my car felt so much different. The shift felt smoother, and much more solid than the stock shifter my car had in it. Not only am I able to adjust the length of the throw but I can adjust the height, which comes in handy since every driver is different and will have a different on throw and height.

With the short throw shifter alone it took 85-90% of the slip from my shifter, but there was still that slight movement when I pushed the shifter into gear, especially when shifting aggressively. Being as picky as I am it did frustrate me – so when Rich contacted me to see if I wanted to test out some shifter bushings my eyes lit up like the fourth of July. Of course I said yes, and the install took all of 15 minutes. The bushings took the remaining movement out of the shifter and I am SO happy with the quality of the parts that Corksport sent me.

Corksport4

I am honestly happy that I received the short shifter prior to receiving the shifter bushings instead of installing them together. Now I know what part changes what movement in the shifter. I can definitely say that pairing these two products together in your car is in your best interest and that each part does have a dramatic change. These products are well worth their money and I would recommend them to any car fiend that is looking for a more responsive and solid feeling shift.

Kaylee

kaylee

Don’t have an adjustable shifter yet? Check them out:  Mazdaspeed or Skyactive.

Product Release! CorkSport Mazdaspeed 3 Front Camber Kit

I’m proud to announce the release of the CorkSport Mazdaspeed 3 Front Camber Kit, our deepest customer collaboration effort to date!

It all began over a year ago with a product submission from Todd Friar, a well-respected member of the Mazdaspeed3 community that you can often find contributing on the forums as Todd98se.

Based on his submission we began exploring manufacturability when we received a second product idea submission from Eric Poyer on 5/03/2011 that helped to confirm the viability of this product. With a second customer willing to participate in the development process we felt confident we could design a part that would be a sales success.

We collected their input on important features and target price and after a few weeks, we presented drawings to Eric and Todd for their consideration.

With their feedback in hand, we developed sample sets for test fitment.

We confirmed successful installation in our shop then got a sample sent out to Todd for further feedback. He even wrote up a fantastic installation process post on the Mazdaspeed forums.

Our initial design required cutting the strut tower, something we were well used to seeing having been in this business for so long. Eric however, was resistant to the idea of cutting his strut tower, something we then realized may be an issue for other customers as well, and a detail we may have missed had it not been for his involvement in the development process.

We knew we had to go back to the drawing board to remove the requirement to cut the strut tower and we also knew we needed to reassure people that cutting the strut tower would not compromise the integrity of the vehicle.

Using Solidworks, we did some force analysis testing that backed up what we already knew from experience and provided the data needed to show that it is possible to safely remove some material from the strut towers.

We also redesigned the camber plates to allow for installation without cutting the strut tower by recessing the bolts.

Other features we incorporated into the production version from Todd’s feedback are larger M10 studs which reduce camber variation during removal and reinstallation and longer studs to allow for improved fitment with strut tower bars.

The final product is a front camber kit that provides up to -3 degrees of negative camber with aftermarket coilovers and can be installed without any permanent modifications. Proper cutting of the strut tower allows for easy access camber tuning to dial in performance handling on and off the track.

Solid pillow ball bearings and housing reduce unwanted upper strut mount deflection and improve handling during racing and high performance driving.

Our camber kit can be used with aftermarket lowering springs and OEM springs for reduced upper strut mount deflection, however, negative camber is limited to 1.5 degrees due to spring interference. We will be revising the CorkSport lowering springs to allow for a wider range of camber adjustment and expect them to be out later in 2012.

Our knowledgebase is a repository for all sorts of information. For the camber plate development process, the interested reader can view each article we wrote during the development process for more details.

Article 1: Article 2: Article 3: Article 4:

Todd and Eric were fantastic during the development process. This was one of the most work intensive products we have released to-date and we could not have done it without them! The CorkSport Mazdaspeed 3 Front Camber Kit is available for purchase from CorkSport.com for $359.00

Rich-