Cold Air Intake Systems Explained for your Naturally Aspirated & Turbo Mazda

Mazda 6 Turbo Performance Intake

Cold air intake systems, are they necessary? Are they worth the extra cost? Does it matter if the engine is turbocharged or not? Will the engine or its performance be hurt without one? We have repeatedly seen these questions on forums and social media groups regarding Mazda’s 3rd and 4th Generation Mazda 3 & 6. To help the Mazda community grow and learn about their cars and what to do with them, we have written a blog that we hope will help shed some light on these questions and others. 

Mazda 3 Turbo Short Ram Intake

Most importantly, you will NOT hurt your engine if you use an SRI only on Turbo or Non-Turbo applications.  

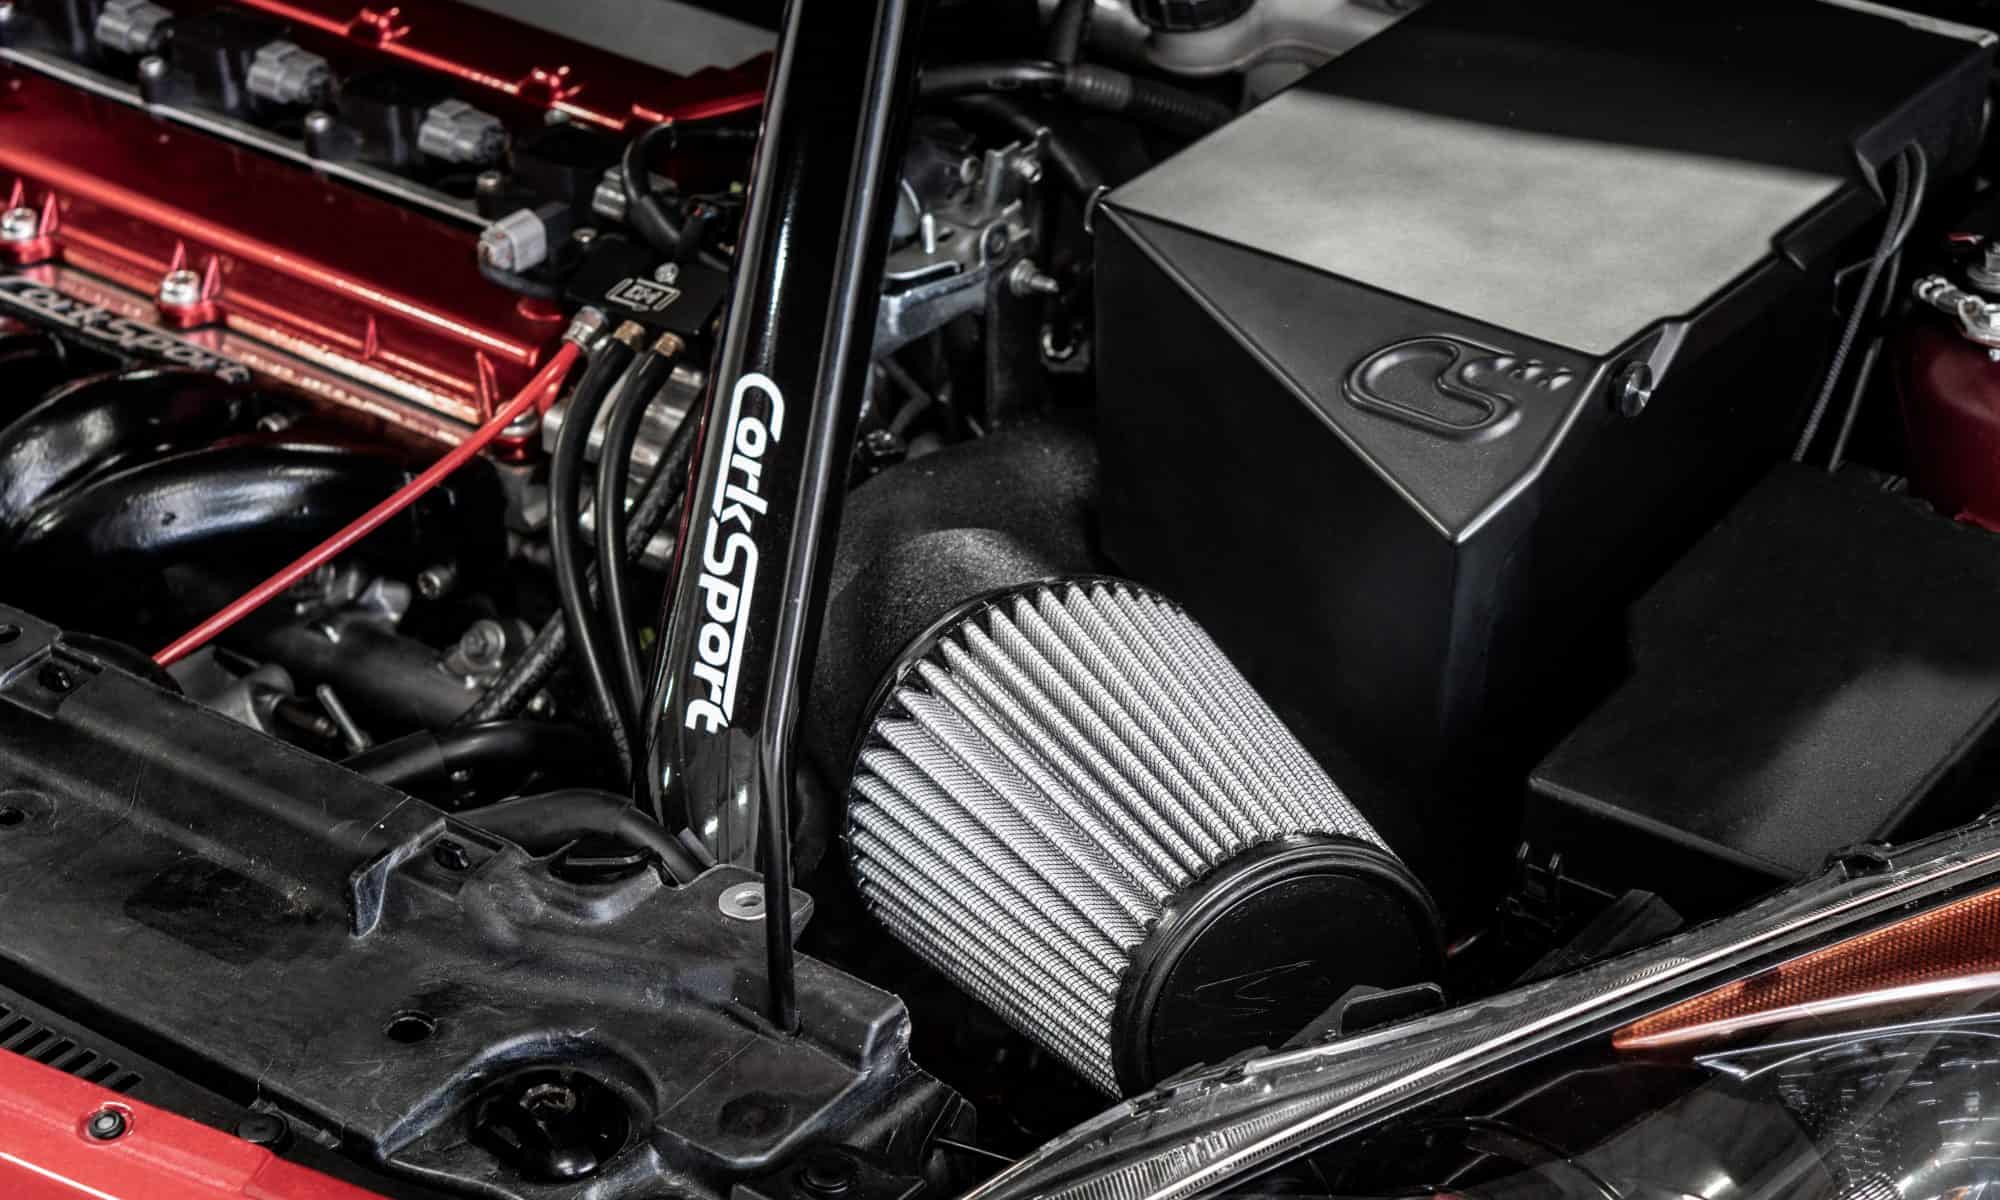
What are the typical intake systems available for your Mazda? At CorkSport, we have two primary intake system setups: Short Ram Intake (SRI) System and Cold Air Intake (CAI) System. It is essential to distinguish between the two because you (the Mazda enthusiasts) will ultimately decide which system to use. 
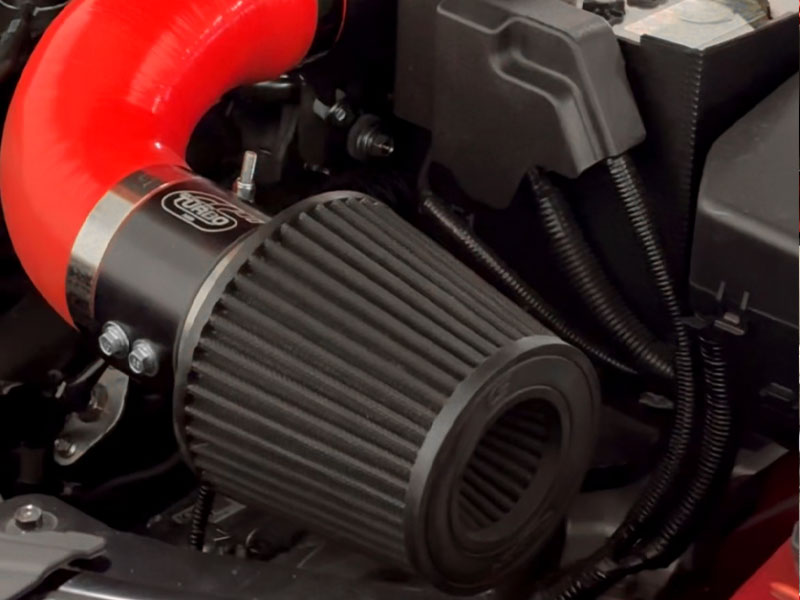
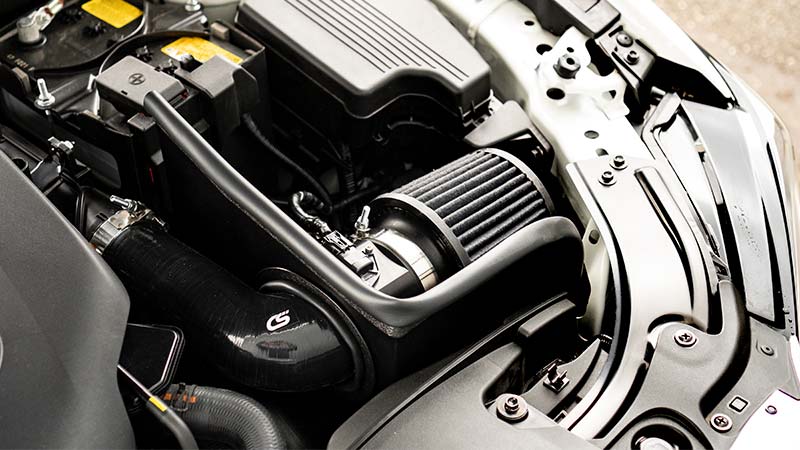
Short Ram Intake (SRI) System

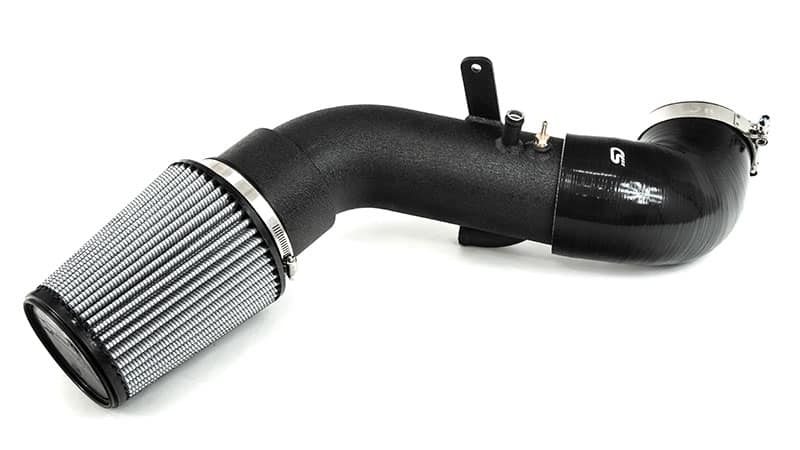
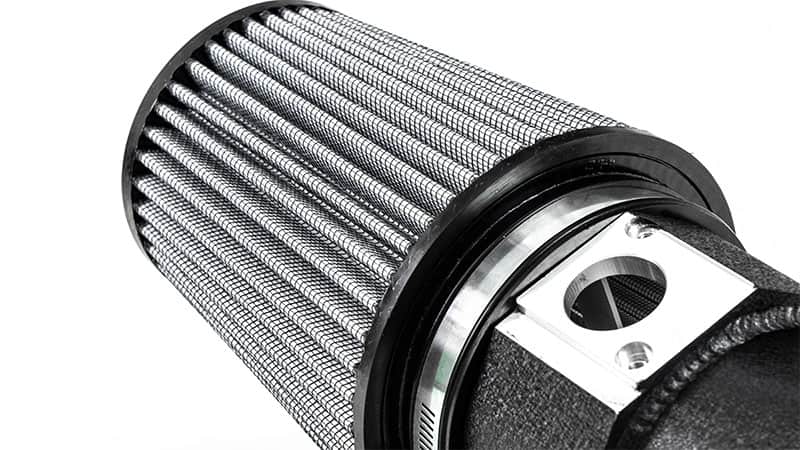
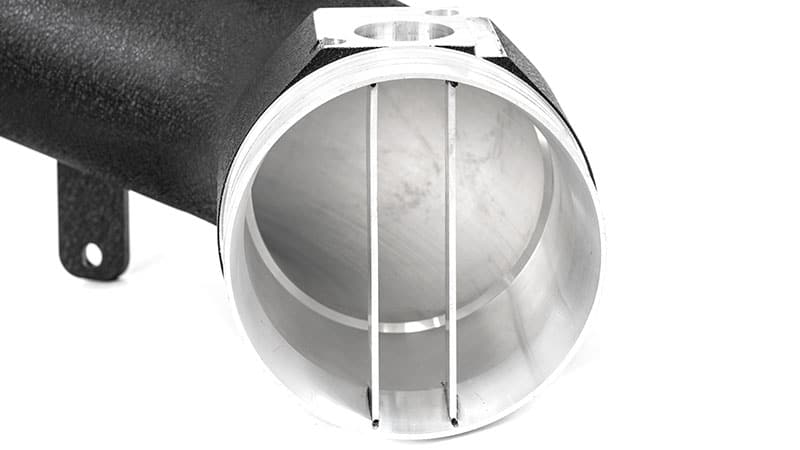
This CorkSport system consists of a filter, billet MAF housing, silicone coupler, a few clamps, and may or may not have a mounting bracket (depending on the application). This system is efficient and straightforward (an unrestricted airflow path increases power). This system removes the factory airbox and snorkel. The cost is very effective for the results and provides excellent induction sounds. 
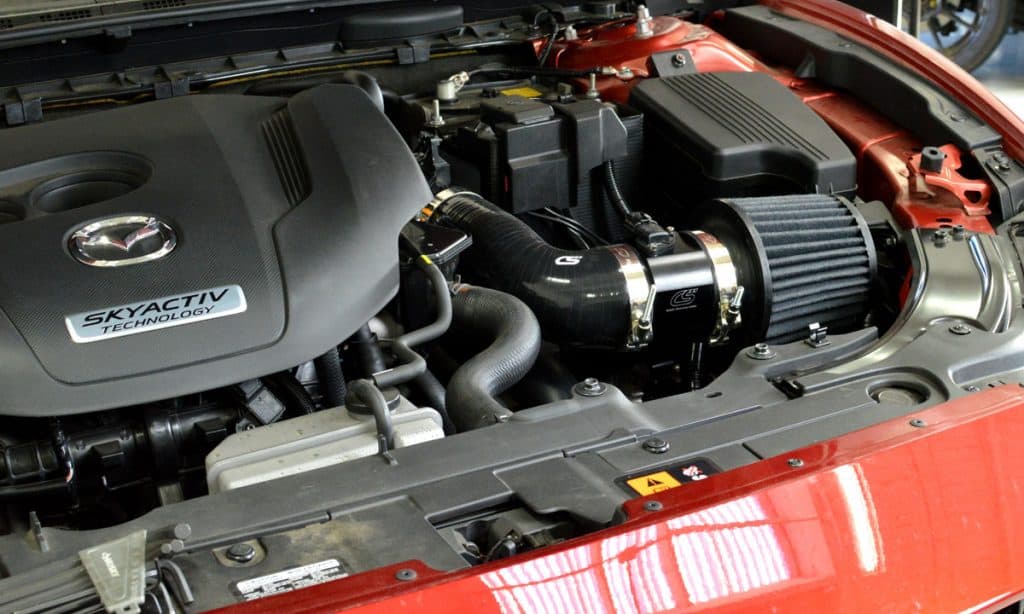
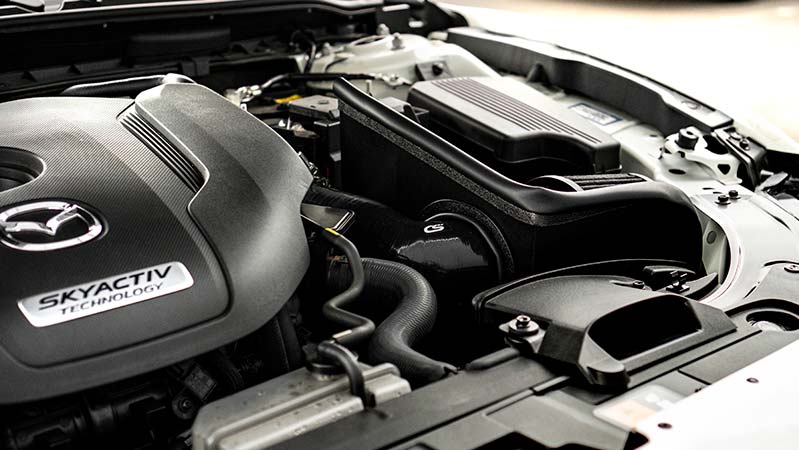
Mazda 6 Turbo Performance Intake

Cold Air Intake (CAI) System

Mazda 3 Cold Air Box for a complete cold air intake system

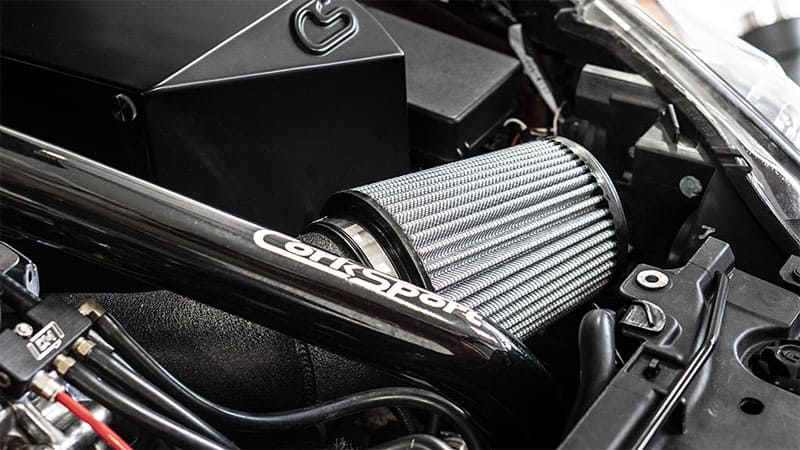
CorkSport’s system consists of the SRI (as mentioned above) plus a heat shield or airbox designed to keep the engine bay heat away from the intake system’s inlet and help direct cold air induction. This system removes the factory airbox and may or may not reuse the factory snorkel. The cost will be higher than a short ram intake due to the additional components involved and may muffle some of the induction noises but provide better heat control.

Mazda performance air intake heat shield

OK, is a Cold Air Intake System worth the extra cost and complexity? Does it do anything? Well, in our opinion, yes and no. We have tested this, and we have proven that a heatshield does improve (read reduce) “heat soak” of the intake system, BUT not in the ways most people expect. Below is some data from our 2018 Mazda 6 Turbo SRI and then also with our SRI + Heat Shield:

Mazda SRI Dyno without a heat shield

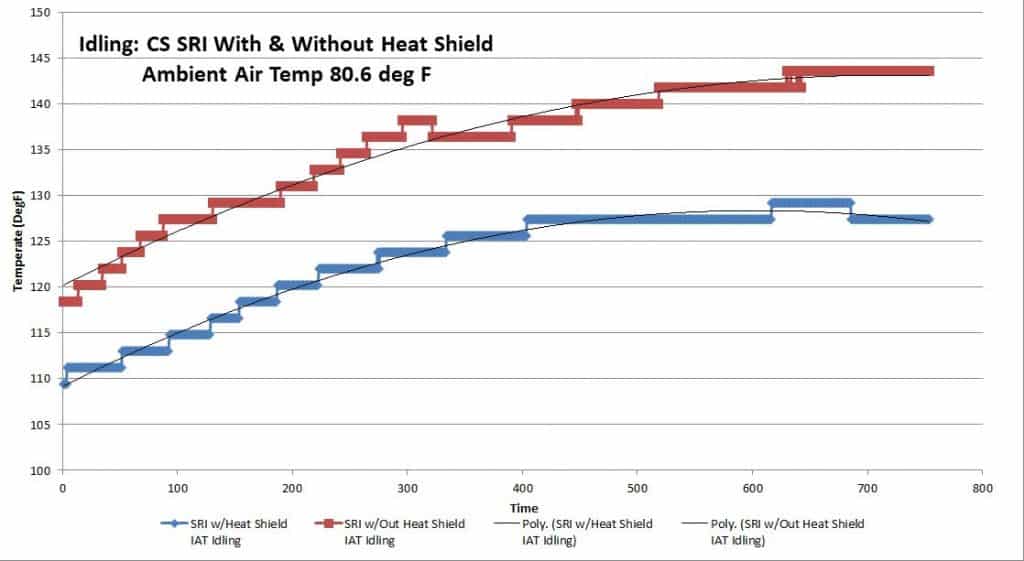
This first graph shows the vehicle idling for a period of time, much like sitting at a stoplight or in traffic. The red graph shows the short ram intake only, and the blue chart shows the SRI+Heat Shield. It’s pretty apparent the heat shield is helping reduce the amount of engine bay heat being ingested by the intake while the vehicle is sitting. The maximum temperature delta is approximately 15-20deg F. That’s a respectable improvement, and this lower amount of heat soak should, in theory, improve the vehicle’s acceleration from a complete stop. Now let’s look at a graph that combines idling and acceleration up to 50mph

Mazda Dyno with Short Ram Intake

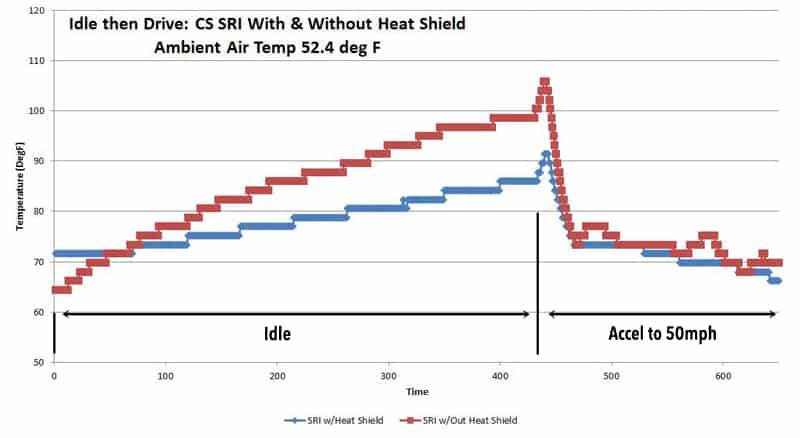
The second graph indicates similar data for the stationary idling period, but more importantly, is what the data tells us once the vehicle starts moving. You see a small spike for both systems (this is due to the engine suddenly ingesting more air), then you see the air temp drop rapidly as the vehicle increases in speed. The vehicle’s forward motion/speed is important because that is how fresh cool ambient air enters the engine bay.

You’ll notice that both the red and blue graphs meet at the same point after the rapid cooling then have a small amount of fluctuation. In a nutshell, both the SRI and SRI+Heat Shield perform about the same once the vehicle is moving. Again, they perform almost identically once the car is rolling.

Mazda Short Ram Intake with Heat Shield Installed

Next question, does it matter if the vehicle is turbocharged or not? Before we answer that, let’s go over the differences between turbocharged and non-turbocharged systems. 

Turbocharged

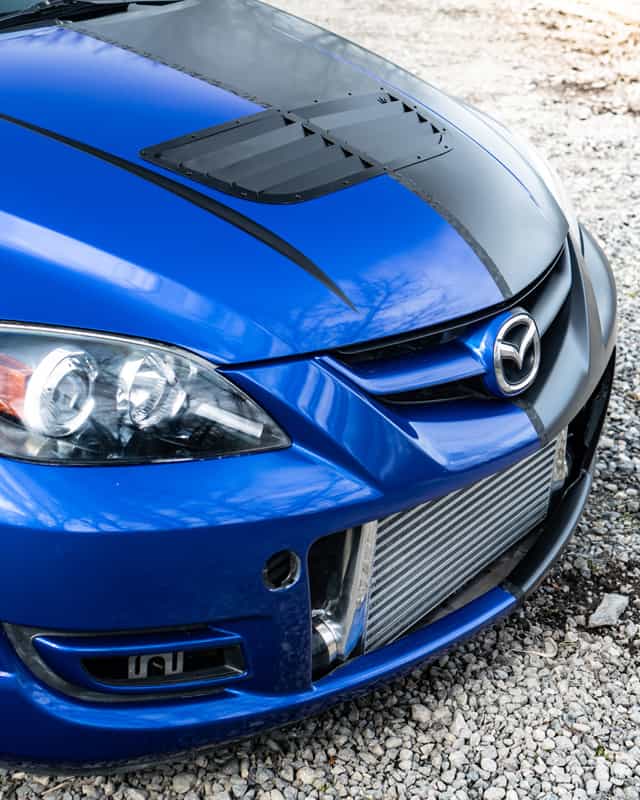
The engine is equipped with a turbocharger and an intercooler system to cool the boosted air temperatures before entering the engine. The intercooler system is required to negate the by-product of turbocharging an engine (and thus boost), which is heat. The airflow path is intake -> turbo -> intercooler -> engine.

Short ram itnake system with turbo inlet pipe in blue on Mazda

In a turbocharged engine, the need for and use of a Cold Air Intake System is typically not deemed necessary or very useful. The turbocharger superheats the cooler air it receives from the intake before passing it to the intercooler. The boosted air exiting the turbo is substantially hotter than the ambient air temperatures in your engine bay before it enters the intake – especially true while the vehicle is moving.    

More focus is placed on performance improvements of the intercooler system because that is the primary method to cool the incoming boosted (read “hot”) airflow before it enters the engine. The use of a cold air intake system has little effect on the resulting boost air temps, so the cost-effectiveness is not great. This is precisely why the Mazdaspeed platform focuses on increasing the intake size (ingesting more air = more power), adding a larger turbo (more boost), and increasing the size of the intercooler (additional surface area for cooling) coupled with a professional tune to maximize power.

Non-Turbocharged

The engine is not equipped with a turbocharger and, therefore, does not require an intercooler system. The airflow path is more direct and does not have a cooling system built-in; intake -> engine.  

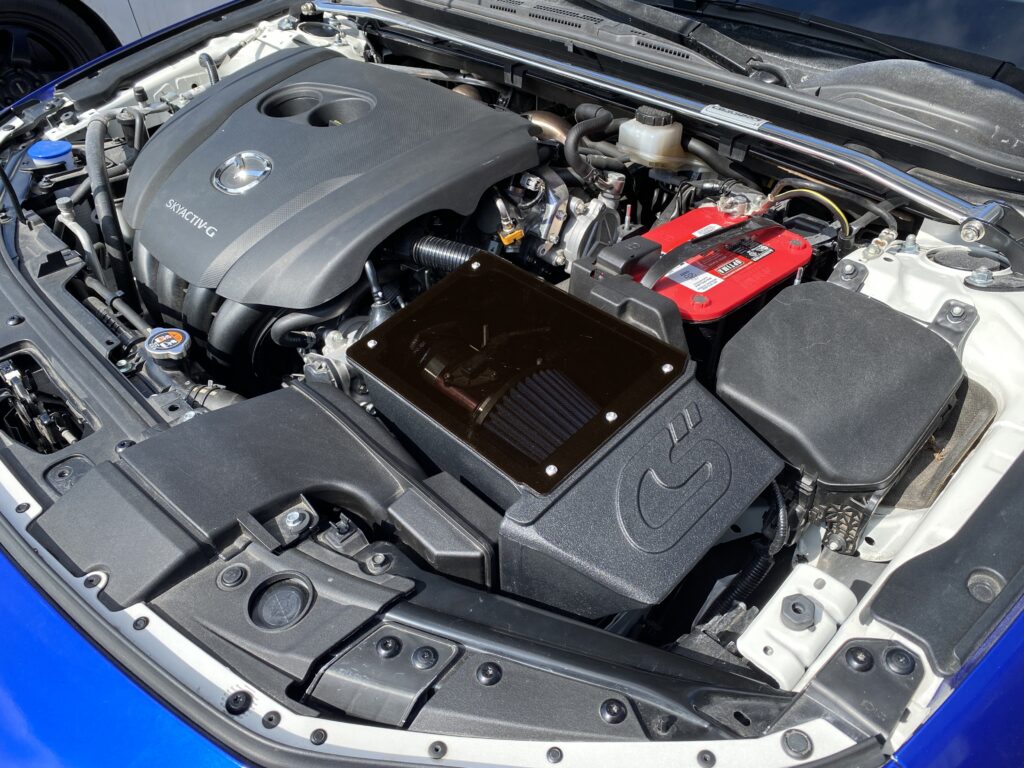
Have a Non-Turbo with our SRI – Check out our new 2019+ Mazda 3 Cold Air Box to keep temps cool!

Since there is no intercooler to cool the incoming air (it’s not needed), the best way to improve air density and performance is with cooler air entering the engine directly. So, a cold air intake on a non-turbo engine can be helpful – especially in warmer climates. 

2019 Mazda 3 short ram air intake

Let’s Recap: 

In either turbo or non-turbo applications, a heat shield or CAI system will provide varying degrees of benefit in some driving situations. For a turbo application specifically, the usefulness of the CAI system is marginal due to the turbo heating the air it receives from the intake. Instead, investing in a short ram intake and performance intercooler system is a much better plan.   

For the non-turbo applications, a cold air intake system is a worthwhile investment because the airflow path is so much more direct, and it’s the only way to help reduce intake air temps and thus increase air density which equals power.  

We hope this has been a helpful and educational blog and lends support as you decide the right path for you and your Mazda! Thanks for tuning in!

-Barett @ CS

Connect with us

You may also Like

Stay up-to-date on the latest news and product updates from CorkSport.

* indicates required

Mazda 6 Turbo Down Pipe

Mazda 6 performance exhaust downpipe

Time for more horsepower and boost with the Skyactiv 2.5 Turbo engine.

The Mazda 6 just got its next upgrade in the form of the CorkSport Downpipe for 2018-2022 models equipped with the 2.5L Turbo engine. We took the OEM downpipe and improved on it in every way, including sound, flow, power potential, and even ease of install! Help unlock power with the Mazda6 Turbo downpipe and take a step forward to more making power!

Mazda 6 Turbo Downpipe for 2018-2022 Turbo

Stay Up-to-date with CorkSport   


The CorkSport downpipe uses a 2-piece design that starts with a cast 304 stainless steel bellmouth. This provides a high-flowing, smooth transition from the turbocharger to the piping that will stand up to the test of time and the high heat of the turbo. The piping is upgraded from the OEM 65mm diameter to 80mm mandrel bent piping to maximize flow and reduce restrictions. The bellmouth is joined to the piping using CNC machined v-band flanges which ensures a leak-free seal.

Mazda 6 Turbo Downpipe for 2018-2022 Turbo

The two-piece design is not all about flow through. We optimized the casting design to be easy to install and tighten all the hardware. Since you do not have the piping in the way, like you would with a one-piece downpipe, the mounting hardware at the turbo is very easy to access! Fitment is also spot on, as we used 3D scan data from the OEM downpipe when designing the CS downpipe. That means great fitment with your existing aftermarket exhaust, or even the OEM one! With exhaust, the CorkSport downpipe will change the exhaust note of your Mazda 6. With the full CS catback exhaust, we noticed a different tone with some extra “growl” and a very slight increase in volume. This goes for both the catted and catless setups, with just a hint more drone with the catless setup.

Mazda 6 Turbo Downpipe for 2018-2022 Turbo

All of the efforts to reduce flow restrictions are in the name of power! By smoothing the exhaust path and eliminating restrictions, the turbocharger can breathe better. While we have not been able to fully tune the car to take advantage of the flow gains (more on that later), typically an upgraded downpipe offers faster spool times, better peak power, and can help hold power better at higher RPMs. We hope to be able to test & validate the power potential of the MZ6T downpipe soon, but for now, know that the CorkSport Downpipe has enough flow capacity to efficiently support 500+ WHP, assuming you’ve got the mods to make that power!

Mazda 6 Turbo Downpipe for 2018-2022 Turbo

So the elephant in the room: tuning. While the CorkSport Downpipe can be installed and driven on an otherwise stock Mazda 6 Turbo, we strongly recommend a tune after installing the CS downpipe. There are some fairly strict limits to airflow and torque in the OEM tune that can result in some mild surging or “hiccups” especially when at wide open throttle. This is simply the car hitting those limits and pulling back power. We have experimented with these limits and have found no long-term effects of hitting the limits or even going beyond. They are very conservative limits for safety with stock parts. With more efficient parts, your engine works easier and is able to produce added power/torque and consume more air so the limits are simply hit easier.

Mazda 6 Turbo Downpipe for 2018-2022 Turbo

Let’s go through some housekeeping on the Mazda 6 Turbo downpipe. We offer the downpipe in both fully catless and with a high flow 300cel cat. As modifying or removing the primary cat is illegal in most areas, both options are sold for off-road or race use only. The fully catless setup will be the best for power gains but also comes with an all but guaranteed check engine light. The catted option cuts down on the smell of a fully catless setup but will sometimes still throw a CEL. This CEL can however be disabled with a tune.

Mazda 6 Turbo Downpipe for 2018-2022 Turbo

Finally, what comes in the box with your MZ6T downpipe? Each kit comes with all the hardware needed for installation. This includes new turbo studs & crimp nuts, exhaust connection hardware, a Remflex exhaust gasket, and the stainless steel v-band clamp for connecting the upper and lower sections. Also included is a support bracket for the downpipe and even a custom heatshield to deflect heat away from engine bay components. Both come with required mounting hardware as well!

Mazda 6 Turbo Downpipe equipment

Be sure to check out the product listing HERE for more images, a product teaser video, and pricing. Ready your Mazda 6 Turbo for some big power with downpipe kit from CorkSport!

Connect with us:

Stay up-to-date on the latest news and product updates from CorkSport.

* indicates required

You may also like:

Vinyl Wrap With a Split Personality

Stickers are worth 5hp right?…So it was only logical to wrap the whole car in a GIANT sticker!  Anyways, on a real note we knew that the @Halfmilespeed3 couldn’t just be fast, it had to look good and what Car Guy or Gal doesn’t want their car to look good?

We have a plan at CorkSport to wrap all of our R&D Shop Cars with an awesome blue that aligns with our “CorkSport Blue”, but we want each car to have a little unique character to it.  Thinking about the halfmilespeed3 build and goal we had the brilliant idea of a split wrap…seems fitting right? Half and Half…

So what did the car look like before the wrap?

2007-2009 Mazdaspeed 3

Metro Grey Mica is the color name and its pretty bland in my opinion.   I added the white roof and hood accents along with white wheels to help brighten up the car, which it did, but it was time for change.  Oh yeah; white wheels and track spec brake pads don’t mix, just an FYI. 

So what is like to get your car wrapped?  What’s the process?  I can’t personally give you details as I did not do the wrap myself, but I was close to the action and watched it all come together.  Respect to those that take this on themselves and to the professionals out there.  It is a tedious process that requires attention to detail to get a great final result.  

Mazdaspeed Vinyl Wrap

A local friend is a professional and was open to doing the work in the CS shop since the Speed was not in a running and driving state at the time.  

Mazdaspeed Vinyl Wrap

Saul S. (@saulywood) did the work over a few weeks’ time in evenings and weekends.  He kicked a** on a project that turned out to be a bit more difficult than expected.  

Installing a wrap is a process of pulling, stretching, heating, cutting…lots of different skills and abilities to get the job done.  All this has to happen without damaging the vehicle you are wrapping.  It’s quite a feat.  

Mazdaspeed Vinyl Wrap

Going through the process the build kind of evolved if you will.  Luckily Saul was very open-minded to it and even a bit eager to try some new things. 

Probably my favorite aspect of the wrap is the unique and new wrap from 3M.  Called “Shadow Black” this wrap has a slight texture to it that depicts patterns sort of like camouflage.  

Mazdaspeed Vinyl Wrap

We used this on the roof and in a narrow strip over the seam between Satin Black and Blue Gloss; it really added a unique aspect to the look and style and brought the two colors together.  Pictures just do not give it justice nor can you feel the texture.  

Halfmilespeed3 build

So let’s wrap this up (see what I did there?) with some finished images.  

Halfmilespeed3 build

I have to admit I’ve fallen in love with my car again.  The exterior of my car was pretty beat up and neglected with rock chips, scuffs, and just generally not well taken care of paint.  With the new wrap there is a whole new rush of pride and enthusiasm to keep it looking amazing. 

Lastly, and this is bit cheesy, I requested Saul to match my helmet to the car…

Halfmilespeed3 build

Why not right?  It’s not just another black helmet and I love it.  

With that I hope you enjoyed this sneak peek into wrapping a Mazdaspeed.  Stay connected as we share more and more about the @halfmilespeed3 build…engine, seats, roll-cage, and power!  At some point this season an event will open and we can actually race!

-Barett @ CS

Connect with us:

Stay up-to-date on the latest news and product updates from CorkSport.

* indicates required

Mazdaspeed Roll Cage Painting, a Necessary Evil

Safety first right?  As much as I want to survive an unfortunate incident while racing my 650+whp Mazdaspeed3…I have a bone to pick with safety.  Sometimes it’s a real pain in the A**.  

Let me explain…and hopefully help you learn from my experience. 

Mazdaspeed3 Drag Racing

Today we are talking about how to paint a roll cage, specifically one that has been custom built to fit tightly inside the cab of a GEN1 Mazdaspeed 3.  How does this relate to safety?  Well…a cage is made from raw steel in “mild” or “chromoly” materials.  Both of these metals will corrode/rust over time. Not only will this result in a very ugly cage inside your car, but it could eventually affect the structural integrity of the roll cage, and that would defeat the whole purpose of it.  

With that I decided to paint the roll cage in my Mazdaspeed 3.  I daily drive and race the car AND I live in the PNW which has lots of rain and moisture.  In fact, in the couple weeks that I did drive the car with the raw cage, I was already getting surface rust build up…gross. 

Mazdaspeed Roll Cage Prep

To add to the difficulty, the cage in my Mazdaspeed was custom built from scratch vs a kit so it was very tight fitting and I have extra “X-bracing” added for increased roll over protection.  This just added to the amount of surface area to paint and the number of locations with bars very close to each other.   

The roll cage/hoop in my #halfmilespeed3 is technically a 8-point cage with an added X-brace in the main hoop and between the rear strut braces.  The X-bracing is what helps with high speed roll over protection, but with a weight penalty.  Go look at any modern rally car and you’ll see X-bracing plus lots more. 

Mazdaspeed Roll Cage Prep

Ok, time to get our hands dirty.  Here are the major items you will need to paint your cage:

  1. Paint – I used a rust-oleum paint & Primer Combo.  Make sure it works with a metal surface.  2-3 cans will be needed to complete the job and I’d suggest a high gloss enamel finish.  It will be much easier to clean.
  2. Safety Equipment – Goggles, Face Mask (a real one with a rating for fine dust), Bunny Suit (because you will get paint ALL over you), Gloves
  3. Scotch Brite Pads – You will need this so you can remove any rust build up (assuming it is minor, if you have a heavily rusting and rough cage then you will need to get far more aggressive)
  4. Cleaner and Rags – Gotta clean the cage after the scotch brite process
  5. Plastic Wrap – This is like industrial size cling wrap.  Easily found at Home Depot or other hardware shops in the painting isle.
     
  6. Blue Tape – A few rolls of the 1.5” will do. 

Step 1: Remove everything you can from the interior (which may not actually be much if you have a cage.  Take your seats out, carpet (what’s left), center console, …etc

When I had the cage installed I decided I wanted to keep the front two seats as factory as possible.  With that I have kept my carpet, center console, dash, door cards, roof upholstery…other than the door bars from the cage, you would have no idea the car has a cage when sitting in the front seats. 

Step 2: Scotch Brite Time!  Grab a pad and start giving your cage a nice rub down. You need to go over all surfaces of the cage if you want good adhesion of the paint to the metal surface.  Once done, do a quick check and I bet you find some missed spots.  Get those also…

Step 3: Clean up time! Grab some clean rags and a cleaner that does not leave any residue.  Clean all the cage surfaces to remove any dust and/or oil.  This is equally as important for good paint adhesion.   

Mazdaspeed Roll Cage Prep

Step 4: Time to seal up the car.  My number one advice here is avoid wind if possible.  This plastic sheet loves to blow away in the wind…it can be very frustrating.  If you have a friend that can help, that would be a great idea. 

You basically want to cover all exposed surfaces inside the car and a lot of the outside of the car.  While you are spray painting, you will be creating a lot of overspray mist floating in the air.  This will settle on all surfaces inside and out.  

I completely wrapped my doors and door edges, inside and outside of the car a bit. 

Mazdaspeed Roll Cage Prep

I completely covered my dash and shifter assembly. 

Mazdaspeed Roll Cage Prep

For the roof upholstery I did not use the plastic wrap, I actually used a piece of cardboard to act like a shield.  I held the cardboard with one hand, shielding the roof while I sprayed the upper sections of the cage.  It was effective and much easier than plastic wrap for that area.  

Step 5: Time to actually paint.  First you need to get into your bunny suit, get your gloves on, your face mask and goggles.  Be proud of how ridiculous you look!

Before you start spraying, make sure you are in a well ventilated area and do not have any other cars or items in close proximity; they will get paint on them. 

Actually Painting: I would advise starting with the hard to reach arrears first.  You are essentially painting inside a jungle gym so get to the hard to reach areas first so you don’t have to worry about touching wet paint later.  I started in the center and top of the cage because I had to be in the car to do so.  Then was able to get to the more outer parts of the cage while outside of the cage.  

Applying the paint is a bit of an art.  You want to apply smooth and consistent layers.  Your hand is always moving side to side as you spray.  Don’t point and shoot or you will get runs in the paint. 

Do a first coat that mostly covers all the surface area, then let it tach up for about an hour or reference the instructions on the can.  Then apply another coat of paint.  Trust me you will find thin or missed spots.  

Mazdaspeed Roll Cage Prep

Step 6: Get out of the bunny suit.  Hahaha ya this can be a process

Anyways, I pushed my car back into the garage and let the paint cure overnight before removing the plastic wrap.  I didn’t want to risk the plastic wrap touching/sticking to the fresh paint.  You may not have that luxury and if you don’t I would at least give the paint a couple hours to cure before removing the plastic. 

Other takeaways – this was an ALL DAY PROJECT.  I thought I could get it done in half a day, but with the concerns about keeping the still installed interior looking good, I was extra cautious with the plastic wrap which added time.  I also did not want to do this again later so I was extra detailed with the painting process.  Checking for missed spots and thin areas after each coat.  

However, the result was well worth the work and I have no regrets about painting the cage.  I can now drive my car without worry of the cage getting ugly or losing strength due to corrosion.  I highly recommend that you take the day or so to make this happen in your car.  

CorkSport Shift S3ctor

I hope you enjoyed this blog and thank you for following along with the @halfmilespeed3. Stay connected (instagram, blog & “Built With Barett” video series) as we share more and more about the @halfmilespeed3 build…engine, seats, roll-cage, and power!  Rolling into the Shift Sector 2021 season we will have more great content to share!

-Barett @ CS

Connect with us:

Stay up-to-date on the latest news and product updates from CorkSport.

* indicates required

Mazdaspeed-3 4 Inch Complete Intake System

If you’re looking for big power (500+whp) potential for your Mazdaspeed 3 and don’t want to be held back by your intake system then look no further!

Benefits of a huge intake with the easy fitment of a smaller intake

Introducing the CorkSport 4” Intake system for ’07-’13 MS3 (Gen1 and Gen2). Featuring mandrel bent piping, a billet MAF housing, and a large aFe dry flow filter; you can get the benefits of a huge 4” intake with the easy fitment of a smaller intake. We went back to the drawing board for this intake to optimize both fitment and performance. Read on for details!

Mazdaspeed3 4" Intake System
2007-2013 Mazdaspeed 3 4 inch Intake System

We truly started from scratch to ensure the best fitment for this intake. The main change is the way the silicone couplers attach to the turbo inlet pipe. To get the pipe as close to the engine as possible for easy fitment, we use a custom-designed coupler off the compressor of the turbo. The 4” intake pipe fits straight into this, making install just that little bit easier. The biggest change though came at the MAF housing connection.

Stay Up-to-date with CorkSport   


Takes up less room than some 3.5″ intakes

Instead of using a silicone coupler between the turbo inlet pipe and the MAF housing, the billet MAF housing is TIG welded directly onto the turbo intake pipe. This further helps fitment and helped us maximize filter size (more on that later). What this means is that you end up with a four-inch intake that takes up less room than some 3.5” intakes on the market while retaining the OEM mounting points and OEM BPV, PCV, and boost vent ports. It even fits with our 51R battery box!

Mazdaspeed3 4" Intake System
2007-2013 Mazdaspeed 3 51r Battery Box

The benefit of a 4” intake system is in the flow capacity. Moving up in intake size, even from a 3.5” to 4” offers an increase in maximum flow capacity. A bigger intake equals the potential for a larger volume of air ingested by the engine, which equals bigger power potential. You also increase the maximum airflow that can be read by the MAF sensor before it peaks, but you must get a tune to scale the MAF sensor.

So what does this mean for power gains?

Typically, a lower horsepower car will not see a power bump but, big power MS3’s can see an increase in power, just by reducing the airflow restriction before the turbo. While you may not quite be at a 3.5” intake’s limit at 600WHP, moving to a 4” intake will increase the efficiency of your build and reduce the strain on your turbo, with a chance at some extra ponies along the way!

Mazdaspeed3 4" Intake System
CorkSport

Increasing piping diameter only does so much if you have a highly restrictive filter. We focused heavily on fitting the biggest filter we could to minimize restrictions coming from the filter. We chose aFe’s Pro Dry S material for great filtration and flow, without having to worry about an oiled filter dirtying the MAF sensor. Check out the image below comparing the new 4” intake filter to the filter used on our 3.5” intakes. The new filter’s media is larger than the entire old filter!

Mazdaspeed3 4" Intake System
CorkSport

While the new CorkSport 4” Intake may be a bit different from our normal intakes, we kept the same billet MAF housing design. A billet machined MAF housing ensures accurate and consistent diameter around the MAF sensor itself vs just using a pipe or plastic MAF housing while also letting us have a TRUE 4-inch inner diameter. This ensures that once calibrated, your MAF sensor will read stable and accurately. To be extra sure MAF readings are great, we pre-install air straighteners to ensure your MAF is getting clean and straight air.

Daily drive your Speed with this 4-inch intake system

With the consistent CNC machine inner diameter at a true 4 inches and the integrated air straighteners, you can daily drive your Speed with this 4-inch intake system and have MAF sensor range over 900whp.

Mazdaspeed3 4" Intake System
2007-2013 Mazdaspeed 3 4 inch Intake System

Each CorkSport 4” Intake System is made from mandrel bent 4” 6061 aluminum tubing for smooth airflow directly into your turbo. The billet aluminum MAF housing is TIG welded into position, as are all ports and brackets to ensure long-lasting strength. Each intake is finished off in a wrinkle black powder coat for a clean look that will match just about any engine bay. We also include your choice of 4-ply reinforced silicone coupler for the turbo inlet. We have 4”, 3”, and OEM diameter silicones so you can be sure your turbo with work great with the CS 4” intake. To finish it off, we include stainless steel T-bolt clamps for the connections, to prevent any vacuum leaks.

Mazdaspeed3 4" Intake System
2007-2013 Mazdaspeed 3 4 inch Intake System

The CorkSport 4 Inch Intake System is a complete package that can help you make big power on your Speed 3. Increase flow capacity and filter size to help that turbo breathe better so you can make more power for longer. Check out the product listing for more images and don’t hesitate to give us a call if you have any questions! Zoom-Zoom!

Stay up-to-date on the latest news and product updates from CorkSport.

* indicates required