Your Mazda breathes just like you do. Maximizing the intake of air for your Mazdaspeed and freeing up the expulsion of used gases (exhaust) will help your vehicle breathe better and go faster.
Intake to Boost Your Turbo
On the intake side, you can set yourself up with a Stage II Power Series Short Ram Intake, which includes our mandrel-bent turbo inlet pipe, custom-designed MAF housing, and silicone coupler. This will free up the airflow into the stock K04 turbo and allow your Mazdaspeed to breathe deeper. The average gains seen here are 10-15 hp.
Exhaust Parts For Performance
For exhaling, you want your Mazdaspeed3 to expel all those used gasses as quick as possible. With the CorkSport turbo-back exhaust, you are reducing the back-pressure and allowing your Mazdaspeed to utilize the potential of its turbo. The kit comes with CorkSport’s full 80mm catback dual exhaust, racepipe, and downpipe. This setup will give the average Mazdaspeed3 owner 28-31 hp at the wheels.
Power Gains Add 46 WHP!
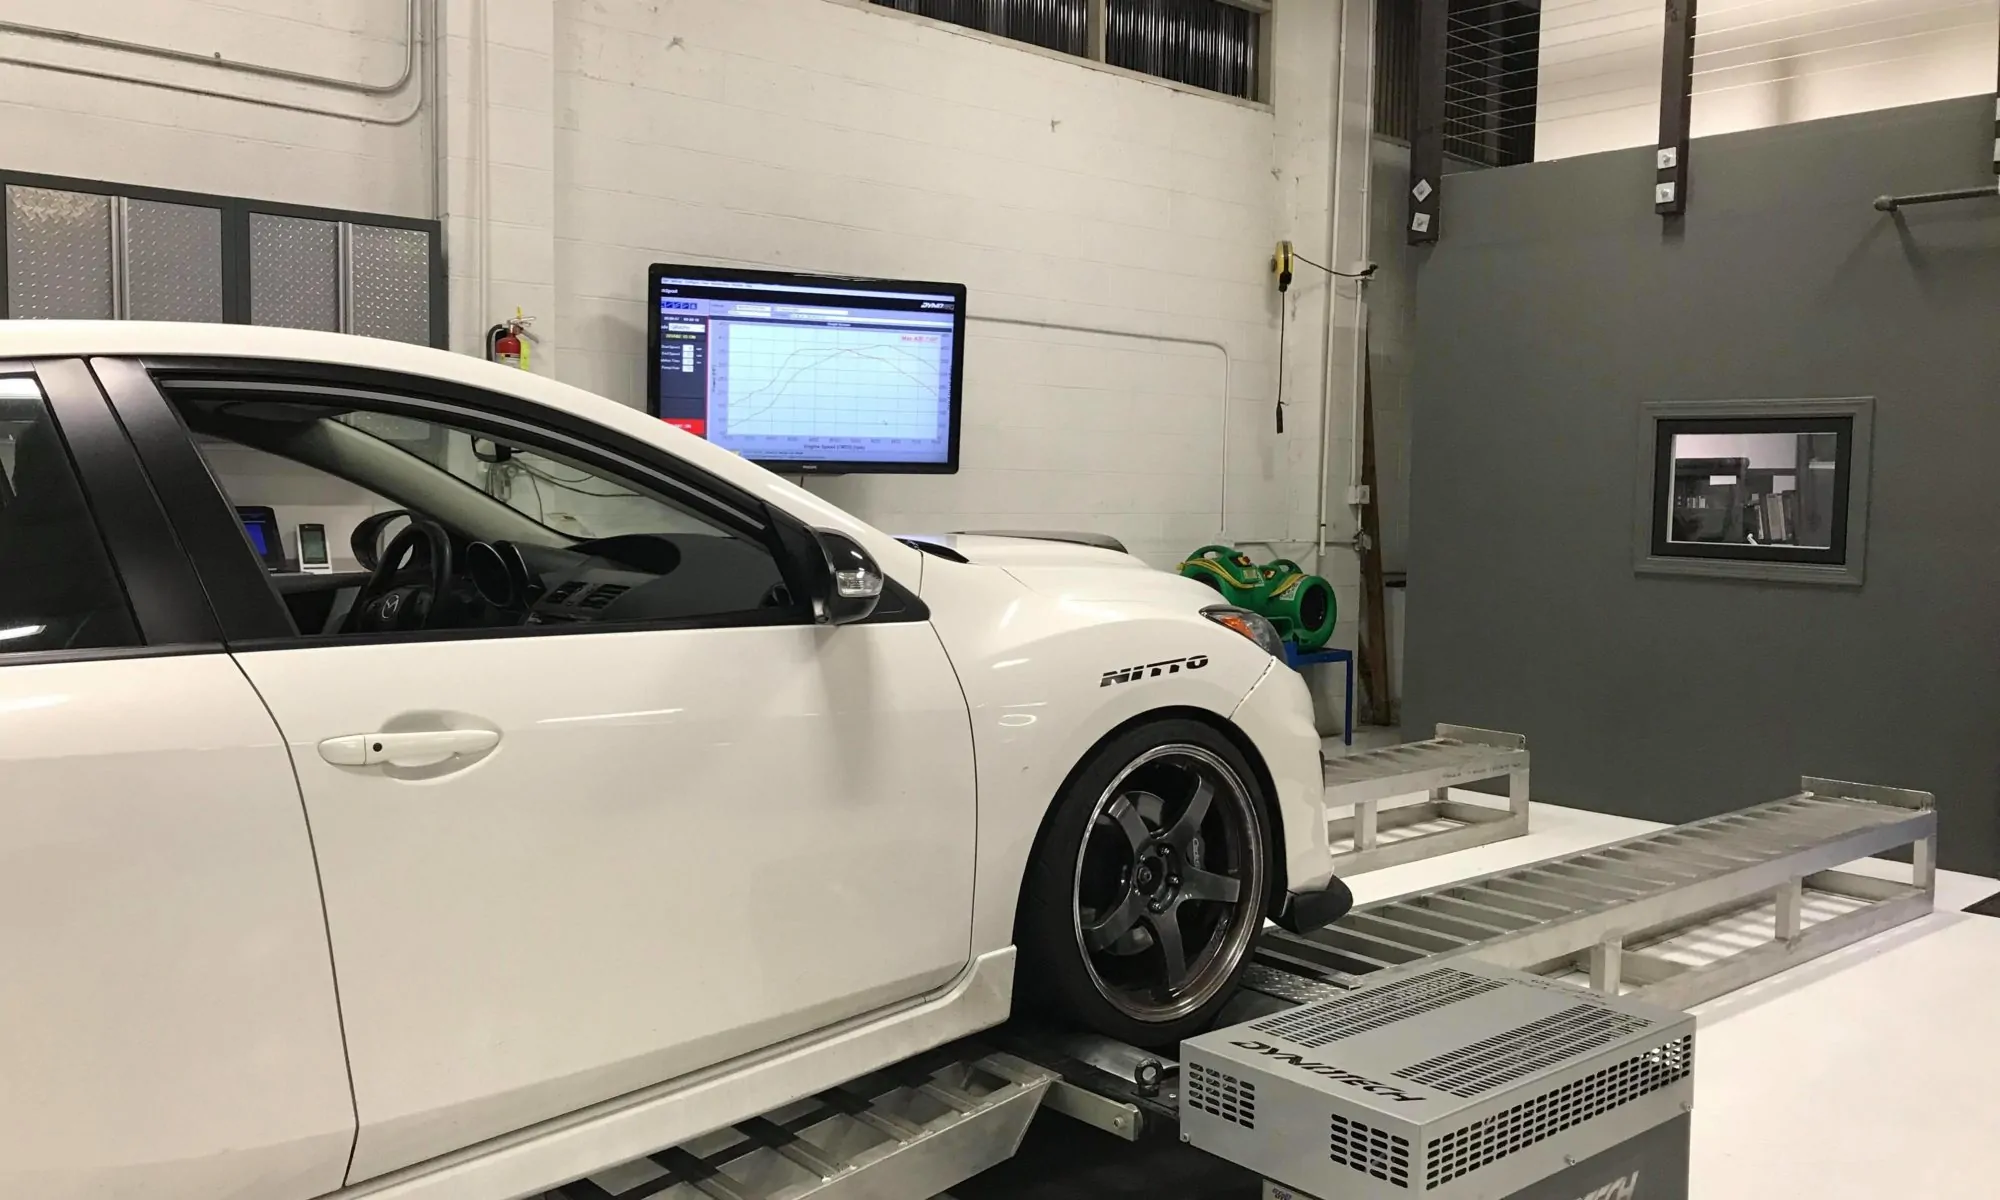
Shown below is our 2010 Mazdaspeed 3 with the CorkSport Short Ram Intake & Turbo-back exhaust and stock turbo, compared to the same Mazdaspeed3 completely stock. The before number is 226 hp and came out to 272 with the SRI and Turbo-back exhaust. That is a 46 hp increase to the wheels with two products.
For those of you on a budget, may I suggest just the Short Ram Intake and racepipe? For this smaller investment, you can get an increase of wheel hp in upper 20’s to lower 30’s.
2010-2013 Mazdaspeed 3 – Best Way to Get 40+ HP August 12th, 2024Derrick Ambrose
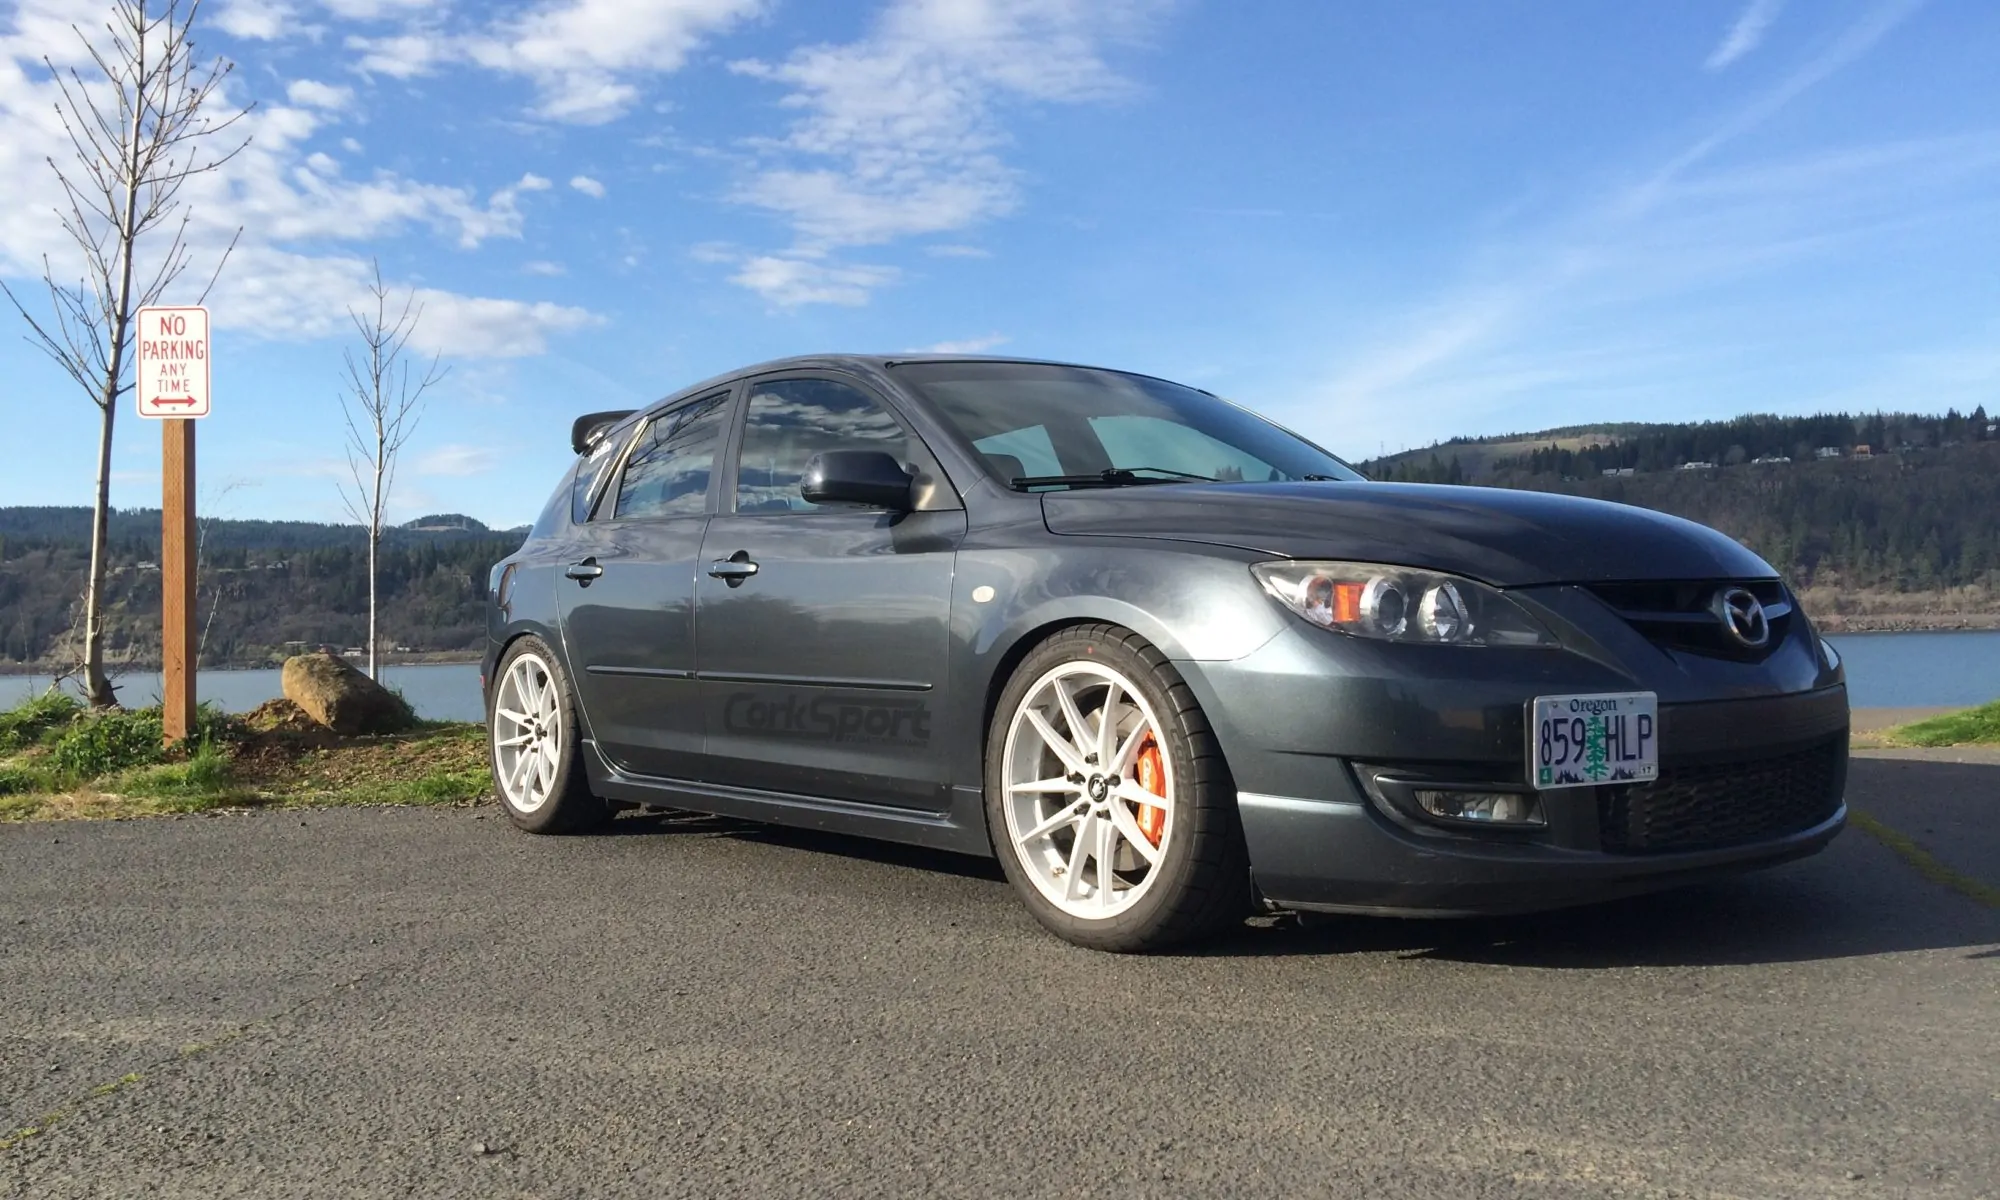
“Hey Bro, what flares are those?” A common question asked, not that I blame anyone for their curiosity.
This is a very niche platform in the grand scheme of things. So we don’t really get lots of options when it comes to widebodies or flares etc. Those of us who have been crazy enough to chop into our ¼ panels had to trust what we think will look good, cross our fingers, and just send it. Some of us get lucky, some of us don’t. I wasn’t in it alone though, I had help from a few friends, and some inspiration. So, here’s the story on how I flared my Mazdaspeed 3.
My good friend Brian over at BMSPEC has a well-known Mazda 3, named “Circuit Heart” Which just recently has gone into retirement. He was one of the first to ever put flares on the Gen 2 Mazda 3 body, and for years I said I wanted that look. When He decided to let go of his old Volks, I had the opportunity to take possession. With his direction, I ordered fair lady Z flares from that were originally meant for a 240Z.
I asked my local Nator Buddy Aaron Maves if he was down to help me chop up my Mazda and lend me a spot in his garage. Ironically enough, he was a stoked to be a part of the project, probably more than me. Once my flares came in, I got them dropped off at the body shop to be paint matched and started hashing out a plan. Since I work all day long, and flares are a rather tedious process this was going to be a strictly after work job and it ended up taking quite some time to get done. But the wait, blood, sweat, and tears were worth it.
Here is a little step by step process we took to get it done. If you are looking to ever do this to your Mazda, it may either motivate you or deter you away. Step 1. – Test Fitting
This part is very critical, and one of the most difficult. You have to Mock up the flare to be as perfect as possible. Usually, since the flares we try to use on our Mazda’s, they don’t exactly want to line up where we want, and we need to motivate them a bit to do so. Painters’ tape by itself will not be enough to hold it where you need. The way I got around this is by using 3M Double Sided VHB tape on the back of where the bolts will go, paired with the painter’s tape. Since these flares weren’t made for this Mazdaspeed3, I started out on my front driver side fender. Once I got it where I knew I wanted it, I opened up pandora’s box. I drilled my pilot holes into the fender, no going back now. That’s not even the worst part, because now I had to make all 4 corners symmetrical (No pressure or anything).
Matching every corner is not an easy task, and also something that is often messed up. All I can say is triple check everything, and then do it again. We had to find reference points on the Speed3 itself to measure from. The ground below could be slightly inconsistent. Not only because the floor may not be perfectly level, but because the floor jacks may be slightly different as well. Choose about 4 points to measure from so you can get an accurate X/Y axis measurement to link to the other side. You’ll want the fronts to be identical, and the rears to be identical.
Step 2 – Rivnuts
Now that we have drilled pilot holes in all 4 corners. We opened them up enough to accept the riv-nuts. This will be the threaded inserts that allow you to bolt the flare to the Mazda. We had to open the hole up slowly, stepping up the size of the bit each pass. Doing this prevents the thin metal from fraying and making sharp edges around the hole. You want the riv-nut to sit as flush as possible, so the flare sits close to the body. In this particular case, I used ¼ – 20 sized bolts, so I opened op the flare with a ¼ hole and bolted the flare on for a final fitment check.
Step 3 – Cutting
The most intense part of the process now begins. My buddy Devin Sorter who is a fabricator/welder came through to help with this. He’s very skilled with a cut off wheel, and I knew I could trust him to make some solid cuts that are symmetrical and clean. With the flares mounted up, we drew the line for the cuts. Remember you not only have to give yourself enough clearance for the bumps on top, but for steering in the front as well. During this process, part of the bumper clip will have to be removed as well. This isn’t a problem though since the flare itself acts as a support and keeps the bumper from sagging, even with the splitter on the front.
Step 4 – Sealing the rear ¼ Panels
Since the ¼ panels in the back aren’t just 1 layer like the front, when you cut into them there is now a gap between the layers that are left open. Even though my Mazdaspeed isn’t driven in the rain, it still leaves the car open and vulnerable to getting moisture in there and eventually causing corrosion. To prevent this, you need to stitch weld the panels together and then reseal it. Once the welding was complete, we used silicone to seal it all in and protect it from the elements. We also put some weather stripping on after the fact to prevent any harsh rubbing on the wheel in case the Mazda bottomed out or the tire somehow traveled up high enough.
At this point, the Mazdaspeed3 was done, and I bolted on the flares. The gasket you use between the flare and the body is up to you, there are lots of options out there. Thanks for checking this out and stay tuned for part 5!
My name is William Dawson; for those who do not know me, I am owner/tuner at Purple Drank Tuning. In this Guest blog, I want to bring up some of the research & development I was able to contribute to with CorkSport (behind the scenes) to help bring some new performance parts to the Mazda community.
One day, many months ago, I was approached by Barett@CS to help with the tuning and development of some mystery parts CorkSport had in the works. Being who I am, I couldn’t turn down the chance to work on some new projects that could help continue to push the Mazda platform we love.
With the pleasantries out of the way, we got down to the plan and the data. Barett had a list of goals and how he wanted to move through the parts in testing. The amount of data that was communicated through the first live tuning session was great. On the CorkSport in-house dyno we took their shop car to an impressive 420whp (e48 + 6 port setup) with stock manifolds, stock throttle body, and stock camshafts.
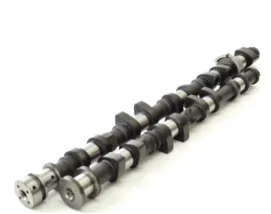
This laid the groundwork and set the stage for their product release of the CS Camshafts which gained 22whp across the curve. Along with the power increase, the camshaft upgrade also netted surprising results with turbo response. The turbo spooled 100rpms quicker than the factory camshaft allowed. THESE ARE DROP IN RESULTS, ZERO ADJUSTMENTS!
Efficiency hit us with another surprise when we decided to put the CS Intake Manifold (set to re-release in early 2019) on the car and help the engine balance all of the air we have begun shoving into our test vehicle. Once again CorkSports engineering pays off with another 9whp increase and 100 rpm quicker spool up. The car lost 2-3 psi of boost, which we were happy to put back in the car, allowing us to do an apples-to-apples comparison, but the numbers elude me, so I cannot speak to what we ended up with on that day.
At this point we did not know how much more we could get as the CorkSport Mazdaspeed Drop-In Turbo that was installed on the test car was producing an impressive 450whp, this did not stop us as we needed to test one more item. In comes the CS 72mm Throttle Body, this upgrade was constantly overlooked by the Mazdaspeed3 and Mazdaspeed6 community because of other attempts to get an upgraded throttle body created complications with drive by wire tables and throttle response.
Personally, having a 75mm TB and not being able to enjoy the on/off throttle response and laggy part throttle was a very frustrating experience, one that even made me skeptical. Then, getting to test CorkSport products was MIND BLOWING! The test car again spooled around 100rpms sooner and throttle response was phenomenal; all with just removing 4 bolts and swapping a Throttle Body this is insanity. This team did it again, my disbelief overshadowed by pure joy that they developed a working unit and it far surpassed the factory unit in throttle response and driveability.
I have known the CorkSport family for years and it does not matter what department I am working with they are always on point and pleasant to deal with regardless of the situation. Between PD and CorkSport I could not be happier to invest countless hours of hard work and R&D to allow this winning family to provide further developments and support to the Mazdaspeed 3 and Mazdaspeed 6 platforms.
– Will Dawson (PD Tuning)
Special thanks to Will for committing his time and expertise to help CorkSport continue to grow and support the Mazdaspeed community. – Barett @ CorkSport
If you haven’t heard already, the CorkSport Dyno Day and Summer Event was a blast with food, friends, raffles, a Show-N-Shine, and the continuous string of dyno runs. The highlight of the dyno runs came when one of the CorkSport Engineers, Barett, put his car on the rollers. With a few minutes of warm up and anticipation building, it was finally time to see what the “CorkSport Speed” could do.
Getting past the ecstatic crowd to see the dyno screen showed an impressive 620whp/530wtq. Now, whether you were at the show or not, you may be wondering what Barett’s setup is to support these numbers. It’s not a short list but is simpler than you would expect.
In this blog, we are going to layout the WHOLE build to show you how your Mazdaspeed can make 600+whp.
The engine was built by CorkSport in preparation for setting up the Dankai Engine Program. It features Manley Connecting Rods and Platinum Pistons, head work very similar to the Dankai 2 Built Longblock, along with the CS BSD (balance shaft delete) and CorkSport Camshafts. Holding the block together are L19 head studs and ARP 2000 main studs.
To get the air in and out of the engine efficiently we have an assortment of bolt-on parts and some prototype parts because what kind of CorkSport R&D car wouldn’t have some prototype performance parts on it? To break this down in the simplest way possible, we have laid out a full build list:
Now, this isn’t the complete list, but it does lay out most of the essential parts to get your Mazdaspeed 3 over 600whp. You might have picked out a couple “prototype” mentions in that list above…well we can share a bit on the new CorkSport Mazdaspeed Turbo. You’ve seen the power it can make…and it still has some more left in it up top, now check it out some sexy billet and massive turbine.
Lastly, none of this power would be possible without the fuel to support it. As you may know already, the OE direct injection fuel system taps out around 380whp on an efficient build so how do we make another 240whp? Auxiliary fueling is the key my friends, and we recently posted a blog to help you explore Methanol Auxiliary Fueling that I invite you to read. To stay focused on Barett’s 600+whp build we have made an auxiliary fueling build list below:
ProMeth 220psi Pump (Essential for flowing this volume of methanol)
Snow Performance Solenoid
Devil’s Own 1in/4out distribution block
4x Devil’s Own 90degree nozzle holders
4x ProMeth Compact Check Valves (Essential for proper AFR control between shifts)
4x Devil’s Own D07 Nozzles (One per intake manifold runner; each flowing ~10gph)
Despite that this auxiliary fuel setup is providing the fuel required to support just over 600whp; it is at the ragged edge of what can be supported. Looking at the dyno graph further up you can see torque decline after 6000rpm and horsepower go flat. This is due to the auxiliary fuel system reaching its maximum fueling capacity and thus forcing us to reduce boost pressure as engine RPM goes past 6000rpm.
At this power level, true port injection auxiliary fueling is the correct step to take. Lucky for you guys and gals, we are currently exploring this path with our product R&D. We plan to give you guys and gals a full breakdown of our experience and how we built a full port injection auxiliary fuel system that can support over 600whp.
AND…I forgot to mention one very critical aspect of this entire build. Professional Tuning! This specific build was E-Tuned on the CorkSport in-house dyno by Dale Owen of Gem Tuning. E-Tuning is a great way to set up your car with the tuner that is the best suited for your platform and vehicle build because it doesn’t require the tuner and the vehicle to be in the same place at the same time.
Hang tight for more on the PI Auxiliary Fueling and thanks for tuning in with CorkSport Performance.
If the title doesn’t tell the story then you must still be at the top of the hill; good luck with that as it won’t last long. Now let me tell you my story.
Even before I got my Mazdaspeed3 I was a tinkerer; I wouldn’t call it modding because there were no off-the-shelf parts for my vehicle at the time. I was 16 years old with my first truck; I quickly made it loud and obnoxious among many other things.
Flash forward to my later years, and you’ll find that I haven’t changed; things have just gotten more expensive… ya, you know what I’m talking about. We don’t grow up; our toys just get more expensive.
So I got my 2009 Mazdaspeed 3 in 2014 with a fresh Mazda Motorsports short block, a CorkSport SRI, and Race Pipe. Oh, don’t let me forget the CS Fuel Pump Internals and Cobb AP… I don’t want to get roasted on my blog. Anyway, that setup was short lived.
Within two weeks’ time, just long enough to break-in the engine, there was a prototype CorkSport Mazdaspeed turbo on my car along with an assortment of other goodies such as a Downpipe, Cat-Back Exhaust, and a few suspension goodies. Two weeks! That’s all it took!
Over the next year, the car had new parts on it every month…perks of the job you could say. I tried the Mazdaspeed3 TMIC setup, and then like everyone else moved to an FMIC setup, new CS Struts and Springs got set up, went to a 3.5” intake, got the engine all mounted up and then various other engine power products like the CorkSport Intake Manifold and Camshafts. Oh! I almost forgot the MS3 Big Brake Kit up front! Damn I have to say going fast is fun, but “throwing out the parachute” as you dive into a corner is just as exhilarating.
Like any seasoned Mazdaspeed owner knows, the OE short block was not long for the world. 18K miles later the infamous friction washers got me with a silent death. All… yes, I mean ALL…of the valves were bent, and the head was looking a bit rough, but luckily I didn’t vent the block.
At that point, my beloved Mazdaspeed and I were not seeing eye-to-eye (I think we have all had this feeling with our project cars right? You debate pushing it off a cliff?) so she sat for a good nine months before I decided I was ready to build the engine.
Wait. What? Remember that slippery slope I told you about? Well, when you are already this deep into the car the slope is covered in gear oil and damn near vertical…so I went deeper into the darkness known as project cars.
A month later I had a built engine (and significantly less money) that was ready to take on 600+ HP and more than eager to continue eating away at my bank account. A built engine wasn’t enough though. I cut up the front of the car for the custom CS Crashbar with/Big Core Intercooler so I could support my new power goal of 500WHP. I have the engine, so I might as well use it, right? (Note: This is the kind of logic that continues to cost you lots of money) To do this, I go the car setup with a larger turbocharger and an AEM Methanol Injection System.
The single 16 GPH nozzle was quickly at its power capacity so without even considering the cost I moved to a port meth injection system that is getting set up as I write this.
Anyways…why does my story matter to you? Well because it’s not just my story, it’s the story of damn near every guy and gal that gets into modding their Mazda. Maybe power isn’t your goal like mine is, but if you’re a motoring enthusiast, then it doesn’t matter. There are so many awesome ways to slide down the proverbial hill.
For all of you at the top still… this is your warning. Enjoy the ride with its bumps and bruises, but most importantly appreciate the experiences and friends you gain along the way.