Project MX-3 Front and Rear Strut Tower Bars
Project MX-3 - STEP 3
Installation of Front Strut Tower Bar:
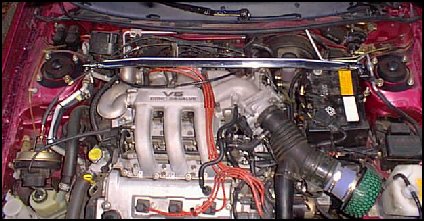
The Fast front strut bar is quite easy to install. As you can see from this picture it fits an A/C equipped car great. Installation of just the front bar without the rear will gives the MX-3 more pronounced understeer. We recommend installing both at the same time.

Install time is about 15 minutes. You'll need: 14mm socket or wrench, hex wrench, and a cresent wrench
Installation of Rear Strut Tower Bar:

As you can see from this picture installation of the rear bar is more difficult than the front. It is necessary to cut a portion of the seat belt retractor mount (lower portion of picture) to accomodate the bar. You will also have to cut the plastic trim panels.

Install time is about 1.5-2 hours. You'll need: Jigsaw, screwdrivers, 14mm & 17mm socket or wrench, hex wrench, and a crescent wrench. The installation of the rear bar balances out the increased regidity gained from the front bar. Overall the car is much more responsive to steering inputs.
An attractive alternative to the Fast bar is the Mazdaspeed rear strut bar. It is designed specifically for the MX-3 and does not require the modification to the seat belt retractor mount.
This picture shows the "Autozam" rear decal. This is one of the nameplates the car is sold under in Japan.

This picture shows the "AZ-3" rear decal. This is the model name for the MX-3 sold under the Autozam brand.

These are easy to install once you remove the old emblems. Be sure to use an adhesive remover that won't damage your paint.
Back to the Project MX-3 page