Project MX-3 Header, Exhaust, Plugs, and Wires
Project MX-3 - STEP 4
Installation of Hurricane Header:
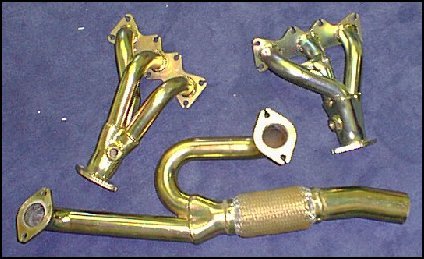
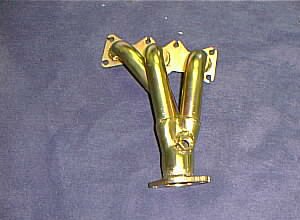
These headers came from Hurricane with everything you see in the picture. We had to make numerous modifications to them for successfull installation into Project MX-3. The Dyno showed a modest gain throughout most of the powerband with the strongest increase at over 6000 RPM.
Here are a few pictures of the headers and a picture of the factory system for comparision.


Our Hurricane kit includes the pre-cat exhaust flange, nuts and bolts, and gaskets. It is necessary to weld the exhaust flange and hangers onto the collector pipe. Most muffler shops will charge $20-40 for this service.
Installation takes about 6 hours which includes a good hour bending and tweaking the EGR pipe to allign well enough to install. The installation if fairly straight forward. The most difficult aspect is access to the exhaust manifold bolts and loosening the exhaust bolts. A healthy dose of WD-40 is necessary to help prevent breaking bolts. Be very carefull not to over tighten the bolts when installing the downpipes to the heads. If you break one of these you will be very sorry.
Below is the results of the Dyno run with the Hurricane header. Keep in mind that the before and after runs were two months apart. We didn't change anything on the car that would affect the power but we did have some experiences with a rough idle in between the Dyno tests. We also have an idea on a mod which will give a couple extra HP with the header installtion. Look below for a Dyno plot with the headers installed.

Installation of the Mazdaspeed Cat-back Exhaust

How do we rate the Mazdaspeed Cat-back exhaust? It is simply awesome! If you remove the cat back exhaust completely you will gain 5 hp at the wheels. However, your MX-3 will resonate/drone the brain out of your head. The Mazdaspeed exhaust is nearly as quiet as the factory exhaust but still results in a gain of 4.2 hp at the wheels.
Installation is very easy. The nuts, bolts, and gaskets are all included. The exhaust already has the hangers in the proper place. All you have to you is remove the old system and install this one. Install time: 1/2 hour if you dont break the cat/resonator pipe bolts.
Installation of Beru Plugs and NGK Wires
We were experiencing occasional miss-fires on Project MX-3. This was because the stock plug wires were shorting on the strut bar! At this point we knew it was time to replace the factory wires.
We decided to install a new set of Beru Silverstone spark plugs and NGK blue 8mm plug wires. This mod (or tune-up depending on your perspective) gave 1hp at the wheels. Installation will take about 1/2 hour. We had to remove the strut bar for easy access to the spark plugs. Below you can see a dyno plot with these additions.

Installation of Probe MAF in MX-3
This is an easy mod that results in a big loss of power. We lost around 10 hp at the wheels. Don't do it!
Back to the Project MX-3 page