Project MX-3 Paint, and a KL-ZE
Project MX-3 - STEP 6
Project MX-3
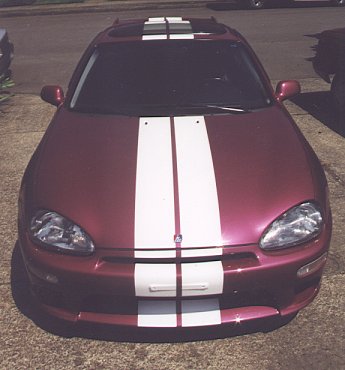
Finally we had the original Mazdaspeed front nose and side skirts painted to match the factory Raspberry Metallic paint. The GTR style wing was installed and painted by the shop. We have come to the conclusion that it is basically impossible to install this spoiler perfectly. The design is bad. It fits the car ok and looks great but does not fit well. Some shops have installed this spoiler with the factory rear hatch garnish installed while others have not. Which way is correct? Who knows?

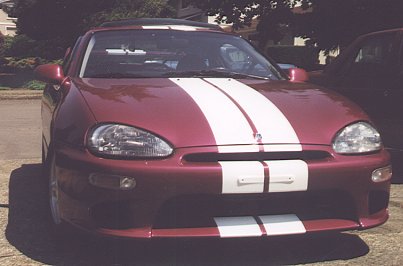
We also had the racing stripes painted on during the same trip to the shop. Each stripe is 7" wide with a 1" gap between them. This stripe draws more attention to the vehicle than any part we have installed.
KL-ZE Installation
There are several resources on the web for MX-3 engine swaps. We had planned an in-depth view of the installation process but that information is already available. Instead we will point out a few difficulties and present a rough outline of the process.
We started by removing the 'old' engine from the MX-3. At 55,000 miles it was still running very strong but it exhibited a typical problems with this engine family. Both valve cover gaskets were leaking. Oil leaked down the spark plug chambers on both heads. Unfortunately due to the intake design this can be quite expensive to have repaired. But who cares, right? This engine is retired for our purposes anyway. The engine removal took about 5 hours. We did not discharge the A/C or drain the power steering fluid. We simply left those pumps sitting on the vehicle. We pulled the engine and transmission out together.
The next step consisted of swapping parts from the 1.8L to the 2.5L. The Japanese variety of this engine had many parts 'missing' or relocated. We swapped the EGR, crank sensor, motor mount #3 and several solenoids. Many of the brackets were not appropriate for the MX-3 engine bay. They were replaced or removed. We transferred the Clutchnet clutch from the 1.8L. This entire step took several hours.
Once we finished swapping parts we noticed three potential problem points. First, the distributors were quite different. The distributor wiring was close but different. Secondly, the knock sensor was wired differently. Finally, we were not able to install one of the temperature sensors onto the 2.5L.
Installation took about 7 hours. It was easier to set the new engine/transmission into the engine bay than it was to remove the old one. We had no clearance problems. We had a few difficulties which slowed us down. The fuel line was routed different on the 2.5L. The knock sensor came out on the wrong side of the engine for use in the MX-3. The Eunos 800 distributor would not function in the MX-3, so we had to swap it for the 1.8L distributor.
We still have a few quirks to work out but overall this was a relatively simple swap for experienced mechanics.
KL-ZE Impressions
Wow! Project MX-3 is a totally different car. It accelerates hard through all five gears. Passing on the freeway is a breeze (no need to down shift). The Clutchnet clutch is perfect mated with this engine. This car puts you back in your seat in second gear like the 1.8L did in first gear. Hmm. what to do now, maybe some VTEC for lunch?
Back to the Project MX-3 page